Tuesday, December 30, 2008
Christmas Napkins
One of my daughters received a napkin folding book for Christmas, and so she was happy to practice with a new design. When it came time for dinner, all of our place settings looked just like this (well, except for the fork being placed too high -- all of the place settings didn't have that special feature)
My daughter thought that a great idea for next year will be to buy some inexpensive and colorful Christmas ornaments to place in the middle of each napkin. On each ornament we will write the name of each guest with some kind of glittery pen, and that will serve as the place card. I can just picture it now. In fact I think I should take advantage of all of the sales going on at present to purchase some inexpensive ornaments in order to carry out this vision. It sounds pretty cute to me.
And as a side note, just in case someone is wondering why I have a yellow dish along with my red dish ..... I used my Fiesta dishes to serve our Christmas dinner on. I have a great variety of colors, and they actually looked quite festive.
Saturday, December 27, 2008
Leftovers
Speaking of cold days, I just have to tell you that since my posting of December 18th we have received a total of 62 inches of snow! Prior to that we only measured 4 inches, bringing the total to 66 inches. These are all official measurements from a couple of days ago. This makes this December our snowiest December on record, and December isn't even over yet. Just last night we received an additional 10-12 inches, and even as I am writing this, we are in the midst of another big snowstorm. It is really coming down hard outside, and it is absolutely gorgeous.
Tuesday, December 23, 2008
Merry Christmas
Sunday, December 21, 2008
My Funny Chickens
They even have funny little tails:
When I finished my first little hen, it just made me smile; and I immediately thought of my sister, Kass. She is always such a cheerful person, and always makes us smile. She is a very talented artist, and everything she paints or draws is very colorful, cheerful, and sometimes very whimsical. Whenever I see something that is very colorful and makes me laugh, I think of her. She has brought a lot of joy into our lives ..... thanks, Kass.
Thursday, December 18, 2008
A Snowy Day
In this picture, if you look real close at the base of the trees, you will see the very top of a fence post of a 3 foot high fence.
This was the beautiful sight that greeted me early this morning looking out my kitchen window onto my deck:
And the playground ...
The cars in the midst of being found ....
And as darkness began to fall this evening, the driveway was finally cleared, some of the snow pulled off of the roof, and we could actually open our gate.
And the fun thing about it all .... we are supposed to get another possible 10 inches tonight. I love winter!!!
Tuesday, December 16, 2008
Baking Inspiration
A cupcake 101 kit including everything someone needs to make cupcakes packaged in a cute tin:
And little sugar flowers for decorating cupcakes or cakes:
There are other unique items for sale that are worth looking at if you enjoy baking or know of someone who does.
Monday, December 15, 2008
Flannel Sheets
Saturday, December 13, 2008
A Snowy Day
I scooped the mix into a clear cellophane bag that is used for putting cookies or candy in. Then I hit my fabric stash for some fun wintery types of fabric. Made a little gift bag and embellished it with some embroidery. My daughters helped me choose some brown ribbon with gold bells tied on it to finish it all off. Here is a picture before it was all put together:
This was really fun to put together, and I think it makes for a very festive presentation of the gift. Now I get to spend the rest of this beautiful, snowy day, making a few more of these while sipping on some hot chocolate of my own.
Wednesday, December 10, 2008
Dickens and Christmas
This morning I came upon this website, where you can find everything you ever wanted to know about Charles Dickens and Christmas. I was directed there via a trail from the homeschool freebie site which also led me to their homeschool radio shows site which currently has a free mp3 adaptation of "The Pickwick Papers" also by Dickens. This location is currently having a Dickens Christmas Festival, wherein each week they offer a free mp3 program just in case you might be interested.
Monday, December 8, 2008
Paper Dolls
You will notice that they don't have any arms. That is because my mom would cut the arms off of the dolls; but then as she chose outfits from the catalog, she would leave the arms on so that any outfit would work with any doll.
Of course there are lots of dolls ...
After she would put the dolls back away in their safe little abode in the cedar chest, I can remember getting out our big catalogs and making some of my own. Of course they weren't as special as hers, and I didn't ever keep any of mine. I wish that I would have, because then my daughters could have played with mine. But that's okay, because they can enjoy the very same ones that my mom was always so kind enough to let me play with.
Saturday, December 6, 2008
The Good Life
Thursday, December 4, 2008
More Hot Chocolate
Hot Chocolate Mix #2
1 (25.6-oz) pkg. instant nonfat dry milk (10-2/3 cups)
1 (6-oz) jar powdered non-dairy creamer
2 cups powdered sugar
29.8 oz. instant chocolate drink mix
20 tablespoons Hershey's baking cocoa
Combine all ingredients together and mix well. Store in an airtight container and use within 6 months.
Add 4 tablespoons of this mix to 1 cup of hot water. Stir to dissolve.
Wednesday, December 3, 2008
Christmas Cookies
Monday, December 1, 2008
Knitting
For the past few years I have been drawn to all of the pretty sock yarn that is out there on the market. When I visit a yarn shop, I always find my way over to this particular yarn, pick it up, and think that I would really like to learn how to knit socks. I have checked books out at the library reading about how to knit socks, but have never actually come to the point where I have begun to knit socks. For my birthday this year, one of my daughters gave me this as a gift:
Everything I need to make my own pair of socks!! My birthday is in the summertime, so obviously I haven't begun them yet; but am looking forward to the perfect cold winter day when I can sit down with a hot cup of tea, pick up my needles and yarn, and begin knitting socks.
Saturday, November 29, 2008
Some Gift Ideas
With everyone's attention turning to gift buying, I thought that maybe I would rattle off a few more gift ideas that might be of help to someone.
For someone living in a cold climate:
A hat, gloves, scarf, hot chocolate mix, and a cute mug all packed in a hat box.
For someone that likes to bake:
A cookbook, new dishtowels, an apron, and some new wooden spoons.
For someone on the go:
A Starbucks gift card, travel mug, and a warm pair of gloves.
For anyone:
A new address book, note cards, fun pens, and a book of stamps.
Friday, November 28, 2008
The Day After
Wednesday, November 26, 2008
Thanksgiving
"And whatever you do in word or deed, do all in the name of the Lord Jesus, giving thanks to God the Father through Him." Colossians 3:17
Pillowcases
Fabric needed for a pillowcase to fit a standard size pillow:
2/3 yd. of main fabric
1/3 yd. of secondary fabric
1/8 yd. of trim fabric
Cut the main fabric 24" x 42"
Cut the secondary fabric 12" x 42"
Cut the trim fabric 2-1/2" x 42"
Fold the trim fabric in half the length and press.
Fold the secondary fabric in half the length and press.
Stitch the unfinished edge of the trim piece to the unfinished edge of the secondary fabric. And then stitch to the main fabric. Stitch the bottom and side of the pillowcase, and that's all there is to it.
Monday, November 24, 2008
Making Plans
"A man's heart plans his way, but the Lord directs his steps." Proverbs 16:9
Saturday, November 22, 2008
Thanksgiving Reminders
Thursday, November 20, 2008
Banana Apple Bread
This bread baked up so beautifully, and was delicious!! The apples really made it moist, and the spices used gave it a most wonderful flavor. I am now definitely sold on the idea of buying this cookbook. Try this recipe out, and see what you think.
A great gift idea would be to give someone who likes to bake, a copy of this cookbook. If you wanted to go another step, you could also include some of this homemade bread on a pretty plate, or in a loaf pan, so that they could make some of their own bread; because after they have eaten the loaf you have baked for them, they will definitely want more.
Mom's Banana Apple Bread
For the apples:
2 tablespoons unsalted butter
3 tablespoons firmly packed dark brown sugar
2 Granny Smith (I actually used winesap) apples, peeled, cored, and cut into 1/2-inch pieces
1/2 teaspoon ground cinnamon
1/2 teaspoon pure vanilla extract
For the banana bread:
2 cups all-purpose flour
1 teaspoon baking soda
1/2 teaspoon ground cinnamon
1/4 teaspoon ground cloves
1/4 teaspoon freshly ground nutmeg
1/2 teaspoon kosher salt
8 tablespoons (1 stick) unsalted butter
1 cup granulated sugar
2 large eggs
1/4 cup fresh orange juice
1 teaspoon pure vanilla extract
1-1/4 cups very ripe mashed bananas (2 to 3)
Position a rack in the center of your oven and preheat the oven to 350 deg. F. Lightly butter and flour a 1-1/2 quart loaf pan.
To make the apples:
Preheat a medium skillet over medium-high heat. Add the butter and brown sugar and heat until bubbling. Add the apples and cinnamon and saute until golden and tender, about 5 minutes. Stir in the vanilla. Remove from the heat and set aside to cool.
To make the banana bread:
1. In a medium bowl, whisk together the flour, baking soda, cinnamon, cloves, nutmeg, and salt.
2. In the bowl of an electric mixer fitted with the paddle attachment, cream the butter and sugar until light and fluffy, 1 to 2 minutes. Add the eggs, one at a time, mixing well after each addition. Scrape down the sides of the bowl.
3. In a small bowl, combine the orange juice and vanilla.
4. Add the flour mixture to the butter mixture in three batches, alternating with the orange juice mixture, mixing well after each addition. Scrape down the sides of the bowl after each flour addition. Stir in the mashed bananas until combined. Then stir in the reserved apples.
5. Pour the batter into the prepared loaf pan. Bake for 55 to 60 minutes, or until a wooden skewer inserted into the center comes out clean. Remove to a wire rack to cool for 20 minutes before unmolding onto the rack to cool further.
Serve slightly warm or at room temperature. The banana bread keeps well wrapped in plastic wrap at room temperature for up to 3 days. For longer storage, freeze well wrapped in plastic wrap and then aluminum foil for up to 3 weeks. Defrost still wrapped at room temperature.
Wednesday, November 19, 2008
Vintage Potholders
Here is a close-up of a cute flower on one of them.
I grew up in a home where my mother, grandmothers, and great-grandmothers all spent a great deal of time crocheting. I learned to appreciate all of the hard work that goes into making such wonderful treasures.
Tuesday, November 18, 2008
Hot Chocolate and Brownies
Hot Chocolate Mix
1 (25.6-oz.) pkg. instant nonfat dry milk (10-2/3 cups)
1 (6-oz.) jar powdered non-dairy creamer
2 cups powdered sugar
1 (16-oz.) can instant chocolate drink mix
Combine all ingredients in a large bowl. Mix well. Put in a large airtight container. Label. Store in a cool, dry place. Use within 6 months. Makes about 17 cups of mix.
To use the mix when making hot chocolate, add 3 tablespoons of the hot chocolate mix to 1 cup of hot water. Stir to dissolve.
(Please note: This recipe makes for a very light chocolate drink. For a stronger chocolate flavor, try this recipe).
Monday, November 17, 2008
My Notebook
Sunday, November 16, 2008
A Brownie Mix
Back to the gift idea though ... A pretty dish with some freshly baked brownies on it, along with a jar of this brownie mix and the recipes would be a great gift for someone. Or even just a cute tin with the mix in it would also be a cute idea. The nice thing about this mix recipe, is that it gives directions for making it in four different pan sizes, which makes it perfect for a small or large family.
Brownie Mix
4 3/4 cups unbleached all-purpose flour
3 3/4 cups Dutch-process cocoa
6 cups granulated sugar
2 teaspoons salt
1 1/2 teaspoons baking powder
Place all of the ingredients into the bowl of a 5-quart mixer fitted with a paddle. Mix on low speed until thoroughly combined. Yield: 12 cups
Mix directions:
Preheat the oven to 350 deg.. Melt butter and stir into the mix. Add eggs, one at a time, stirring until evenly moistened. Stir in the vanilla and any nuts or chips you choose. Spoon into your greased pan and bake for the time indicated.
9 x 5 - inch loaf pan (toaster oven)
1 1/2 cups brownie mix
6 tablespoons unsalted butter, melted
2 medium or 1 1/2 large eggs
1 tsp. vanilla extract
1/4 cup each nuts and chips
Bake for 22 to 24 minutes
9-inch square pan
3 cups brownie mix
3/4 cup unsalted butter, melted
3 large eggs
2 tsp. vanilla extract
1/2 cup each nuts and chips
Bake for 24 to 26 minutes
9 x 13-inch pan
4 1/4 cups brownie mix
1 cup unsalted butter, melted
4 large eggs
1 tablespoon vanilla extract
3/4 cup each nuts and chips
Bake for 23 to 25 minutes
13 x 18-inch half-sheet pan
7 cups brownie mix
7 large eggs
1 3/4 cups unsalted butter, melted
1 tablespoon plus 2 teaspoons vanilla extract
1 1/4 cups each nuts and chips
Bake for 27 to 29 minutes
Saturday, November 15, 2008
Turkeys
And while we are talking turkeys, here is a possible gift idea. If you know someone who is newly married or someone just starting out on their own, why not buy a roasting pan and put a turkey baster, box of stuffing, a can of cranberry sauce, can of pumpkin, and your favorite holiday recipes inside of it. You could even include a gift certificate to a grocery store so that they can buy their holiday turkey.
Friday, November 14, 2008
Hooray for Christmas
Freezing Bananas
Thursday, November 13, 2008
Gift Ideas
I have always liked making gifts, and putting together gift-basket types of gifts, so I thought that in the next couple of weeks I would try and share some gift ideas just in case it might be helpful to anyone trying to think of that perfect something. I will spare you the decoupage and string-art ideas though. Actually one of the string-art pictures still remains. It belonged to my mom and dad, and bless their hearts, they kept it hanging on their living room wall for quite some time. When my mom moved out of their house, and needed to scale down, I somehow ended up with the string-art picture. It currently hangs out in our garage, and literally, whenever I see it, it makes me smile.
Just to get us going, I thought I would expand on the above pizza idea. If you know someone who likes pizza, you could buy a pizza pan, a pizza cutter, a jar of pizza sauce, and place the dry ingredients of your favorite pizza crust in a cute jar along with your favorite pizza recipe or recipes. If you wanted to spend a little more, you could even include a pizza stone. Of course any variation of this gift would work depending on your budget.
And one important note to make as this gift giving time approaches us ... we should go into it with a joyful mindset. Guard yourself against frustrations or just giving someone something to simply cross it off of your list. You are giving them a "gift". Give it out of love and with a thankful heart to God that He has been so gracious to provide you with the means to give to others.
Tuesday, November 11, 2008
Dishtowels
My dishtowels are categorized into three separate piles. I have the oldest ones that look so pitiful they are only used basically as rags when a bad spill happens or some such event that I really don't mind if the towels should get stained. Then I have my middle-of-the-road towels. They are still good for all intents and purposes, they just aren't as bright and cheerful as they once were. And then I have my good dishtowels. This is made up of my current favorite towels. Their colors are still bright and new looking. In the mornings when I decide which towel to set out for the day, I always reach for this pile first. Sometimes I just take whichever towel is on top; and other days I actually take a moment and decide which one I would like to set out. Recently, when a couple of my good towels made their way to the middle-of-the-road towel pile, I decided to get a couple of new ones. I went with red -- it just seemed the most cheerful at the time.
Monday, November 10, 2008
Apple Pie #3
This recipe comes from the "Ladies' Home Journal 100 Great Pie & Pastry Recipes" cookbook. I really enjoy looking through this cookbook. There is a recipe in it for a chocolate peanut butter ice cream pie that has 720 calories per slice! Wow - that's a lot!! But it looks so delicious that I plan on making it some day.
Apple Pie #3
Pastry for a two crust pie
1 cup granulated sugar
3/4 cup orange juice
1/4 cup butter or margarine
1 tablespoon all-purpose flour
1/2 teaspoon nutmeg
8 cups Winesap or Rome Beauty apples, peeled, cored, and thinly sliced
Preheat oven to 400 deg. F.
For the filling, combine the sugar, orange juice, butter, flour, and nutmeg in a small saucepan. Cook, stirring over low heat until the sugar is dissolved and butter is melted.
Roll out the bottom crust for your pie and place it in your pie plate. Spoon the sliced apples into the pastry. Pour the sugar-orange mixture over the apples.
Prepare a lattice crust with your remaining pastry, and arrange on the top of your pie.
Bake for 15 minutes. Reduce oven temperature to 350 deg. F. Bake for 50 to 60 minutes more or until the apples are tender. Cool pie completely on a wire rack or serve warm.
Enjoy!!
Sunday, November 9, 2008
The Burp Cloths
1. I used flannel which I pre-washed and dried. You can of course make the burp cloth any size that you would like.
2. I cut the front of mine into a rectangle that was 9 1/2 x 13 1/2 inches. At this point I added the embroidery. You could also applique or add no embellishment at all. Just make sure that your embellishment will be able to withstand multiple washings.
3. Cut strips of flannel 1 1/2 inches wide and sew them to the sides of the front piece, and then to the top and bottom.
4. Cut another piece of flannel the size of the top that now includes the small border strips.
5. Place the pieces right sides together and stitch all around with a 1/4 inch seam allowance leaving a small area open for turning.
6. Trim the seam allowances, clip the corners, and press.
7. Turn the burp cloth right side out and press once again making sure that you turn the seam allowance inside the cloth where you turned it.
8. Edge stitch close to the edge around the entire cloth.
I certainly hope that this makes some sense. If anyone has a question, I am more than happy to answer it.
Saturday, November 8, 2008
Freezing Fruit Pies
I prepare the pies in the usual manner with a bottom and top crust. If your pies are typically juicy, then you can also add an additional tablespoon of thickener when you put it together. If you are going to freeze the pie, then it is best not to cut a vent in the top of it at this time. However, any observant readers will note that I actually did cut a vent in the picture of my "Apple Pie Number 2" that I posted before I froze it. I just did it out of habit, but don't think it will really make that much of a difference when it comes right down to it. Anyway, you should wrap the pie well, label it, and pop it in the freezer. I actually just pop it directly into a large freezer bag and make sure I get all of the air out of it. 2 gallon plastic storage bags are available at the grocery store in which a pie plate will fit nicely. I also label the baggie with the baking temperature and time since I could never keep track of which recipe was used in which pie. This way I don't have to hunt down the recipe at baking time, it's all right there on the bag.
When the opportunity arises to bake your pie, preheat the oven, unwrap the pie, place it on a cookie sheet, and cut vents in the top crust. Bake the unthawed pie just adding about 15 to 20 minutes to the recommended baking time. I personally have a problem with the edges of my pies getting too brown, so I purchased a couple of round pie shields that I just set right over the edges of my pie while it bakes. You can also use foil around the edges of your pie as well.
If you don't have extra pie plates to fill and freeze, you can also prepare the filling for a pie and put the filling in the freezer. When you are ready to use it, take it out of the freezer while you make the crust, put the filling directly in the crust, and continue as your recipe directs you.
I did mention that this is to be a day in the kitchen for me. I think I had better get busy on making pies myself.
Thursday, November 6, 2008
Babies and Burp Cloths
I made them out of flannel and then added some embroidery. As long as babies need to burp on something, it might as well be fun for them to look at. We do need to come up with a more dignified name for them than "burp cloths" though, don't you think?
Bleach
Wednesday, November 5, 2008
Apple Seeds
Years ago I was the leader of my daughters' Girl Scout troop. I brought apples for each of the girls to the meeting and wanted to teach them how they could start their own apple trees. They ate their apples, and planted the seeds as I had told them. When my daughters' trees started growing, it was very exciting, and the trees grew on their windowsill for a while. I don't remember what happened to their trees, but what I do remember is my son's impression of the whole process. He was only 7 at the time, and of course it was necessary that he come to the meetings with us. He would usually just play with his trucks or keep himself busy somehow during the meetings. But at this particular meeting, he must have been paying attention. When we got home he told me that he would like to plant some apple seeds. So I bought some apples, he ate one, and planted the seeds. Again, it was very exciting when his trees began growing. They grew on his windowsill for a while, but then he wanted to re-pot them. We planted them into a bucket, and the trees moved outside. They grew in the bucket for a long time, and eventually were needing to be transplanted. I gave him a corner in my garden to plant them, and as time went by they grew larger and larger. About four years ago, we transplanted one of the nicest ones into the yard. However, when we got a new puppy she chewed it in half. It is now lovingly referred to as our "apple bush". Each year in the spring I look for blossoms on his trees, and we have never seen any. We have thinned out some of the smaller trees, and there is now one very large apple tree growing in the corner of my garden. This year while I was weeding around it I noticed a very small apple laying on the ground. I looked up and could hardly believe my eyes --- there were real apples growing on the tree! Obviously I just didn't see the few blossoms that must have been growing this spring. We counted 12 apples. The other day my daughter and I picked the apples (at least the ones we could reach). I counted 18 apples growing on the tree. It has taken 13 years for this tree to bear fruit, but God was faithful nonetheless.
In case anyone is interested, it is very easy to grow your own apple tree. All you need is an apple, a small pot of dirt, and apparently about 13 years. After you eat the apple, plant the seeds in the potting soil and water it well. Place the pot in a brown paper bag and keep in a refrigerator for 6 weeks. After 6 weeks, water the pot once again and place in a sunny spot. Continue to water it and it should start to peek out of the soil in a short amount of time. And don't forget to write on the outside of the bag what kind of apple it is. We didn't do that, and I have absolutely no idea what kind of apples are growing on our tree.
Tuesday, November 4, 2008
The Library
Monday, November 3, 2008
Mondays
"I will extol You, my God, O King; and I will bless Your name forever and ever. Every day I will bless You, and I will praise Your name forever and ever. Great is the LORD, and greatly to be praised; and His greatness is unsearchable." Psalm 145:1-3
Sunday, November 2, 2008
Rotary Cutters
I was able to give it a try, and liked it immediately. Some of the advantages that I like are the way that you hold onto it (it seems to be much more comfortable than my old one); the easy way of opening the safety cover over the blade (you just give it a roll on your cutting mat, and it opens by itself); when changing the blade you just have to unscrew one little knob and pop the new blade one (no more wondering in what order to put back all of the extra pieces that seem to fall off on the old ones -- at least that always left me wondering); a model is made for both left and right handed people; and boy does it glide through the fabric (of course that could have a lot to do with the fact that the blade is actually sharp, in contrast to me trying to get as much mileage out of my old blades as I possibly could). There were other colors, but I favored the red one. Here is another view of it:
And this is how you hold it:
Saturday, November 1, 2008
Mexican Rice
Mexican Rice
2 T. oil
1 cup long grain white rice
1 1/2 tsp. chili powder
1/2 tsp salt
1/4 tsp. each oregano, cumin, & garlic powder
1 T. dry onion
Dash red pepper (optional)
8 oz. can tomato sauce
2 cups water
Heat the oil in a 2 quart saucepan over medium heat. Add the rice and stir until it begins to brown. Add the seasonings, tomato sauce, and water. Stir and bring to a boil. Once it begins to boil, place a cover on the pan, and reduce the heat to very low. Cook for 20 minutes. Remove from the heat and let stand for about 5 minutes before serving.
Friday, October 31, 2008
A New Cookbook
This cookbook is a collection of 1400 of the best recipes from all 5 of the cookbooks in the series. Of course I bought it, and have been looking through it deciding which recipes I want to try first. I will keep you posted on our favorites.
Wednesday, October 29, 2008
Apple Pie #2
My kitchen is very tiny, so when I do make pie crusts, I take over the kitchen table since I don't have the cupboard space. Here is proof that I did indeed make a homemade crust for "Apple Pie #2":
Tuesday, October 28, 2008
A Great Apple Snack
Sunday, October 26, 2008
Pumpkin Pie
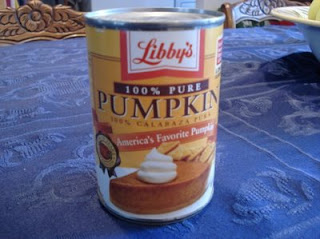
with a note attached written in all capital letters saying PLEASE. So how could I resist such a request. Later that day when my kids got home from school, they were very surprised to see that I had actually baked them this:
I don't think it lessened our anticipation for our Thanksgiving pumpkin pie by any means. It only has made us look forward to it all that much more.
Saturday, October 25, 2008
Tea
Thursday, October 23, 2008
What's for Dinner?
Pasta & Meatball Soup
Meatballs:
1 lb. ground beef
1/2 cup bread crumbs
1/4 cup chopped onion
2 T. milk
2 T. chopped fresh parsley
1/2 t. marjoram
1/4 t. salt
1/8 t. pepper
1 egg
Soup:
2 T. oil
1 onion
1 carrot, diced
1 1/2 cups celery, chopped
1 clove garlic, minced
2 bay leaves
1/2 package corkscrew pasta
1 cup fresh spinach, chopped
1 (6 oz.) can tomato paste
3 cups water
1 t. salt
1 t. basil
1 t. oregano
1/2 t. rosemary
1 (28 oz.) can Italian plum tomatoes
1/4 t. pepper
Grated Parmesan or mozzarella cheese
To prepare meatballs: mix ingredients and form into round 1 inch balls. In soup pot cook the meatballs on medium/high heat until browned all around. Drain on paper towels. Save drippings.
To prepare soup: In the drippings cook onion, carrot, celery, and garlic until tender. Add tomatoes, tomato paste, water, salt, spices, and bay leaves. Break up tomatoes. Add meatballs. Over high heat bring to a boil. Then reduce heat to low. Cover. Simmer 30 minutes and stir in pasta. Cook for 10 more minutes. Stir in spinach. Cook 5 minutes and garnish with cheese. Serve.
Wednesday, October 22, 2008
Tacos
Taco Seasoning Mix
2 tsp. instant minced onion
1 tsp. salt
1 tsp. chili powder
1/2 tsp. cornstarch
1/2 tsp. crushed dried red pepper
1/2 tsp. instant minced garlic
1/4 tsp. dried oregano
1/2 tsp. ground cumin
Combine all ingredients in a small bowl until evenly distributed. After browning 1 lb. of ground beef, add the seasoning mix, along with 1/2 cup water, and simmer for 10 minutes, stirring occasionally.
And there you have it -- your very own taco seasoning mix.
Tuesday, October 21, 2008
Saving Tomato Seeds
Each year I plant a lot of tomatoes -- 14 plants to be exact. Two of those plants are very special tomato plants. The original seed packets came from Austria from my sister and brother-in-law when they had vacationed there. They are the cutest plants. They are very small, but grow a nice sized tomato, just a little smaller than a typical Early Girl. I don't know the official name of them because the seed packet is all in German. So I just call them my "Austrian tomatoes". The first year I planted them in the garden amongst all of the other tomato plants they looked like miniature tomato plants. The following year I decided to try them in pots, and they did great. When I had finally come to the end of my seeds, I decided I would try saving the seeds from the last of the Austrian tomatoes. So I did a bit of looking around to see how one goes about saving seeds, and this is what I found out, and it works great.
Cut open the tomato that you want to save the seeds from. Scoop out the insides of the tomato where the seeds are and place them in a small container. Add 2 tablespoons of water. Cover with plastic wrap and poke a couple of holes in the plastic so that air can circulate. Each day give the container a little stir. After a couple of days they will have begun to ferment. At this point carefully scrape off all of the stuff on the top, and thoroughly rinse the seeds in a small strainer. Place the seeds on a clean coffee filter or a piece of waxed paper, and let them sit to dry for a couple of days. Once they are completely dry, you can store them in a plastic bag and they are ready to plant next spring. I also label the year on the package.
Tomato seeds last a long time. Don't let anyone fool you into thinking they are only good for one year. This year I planted seeds that I had saved in 2002, and they germinated beautifully. I also have saved seeds from volunteer tomato plants that have grown in my garden that were different than any others that I have grown. This year for instance, I had some absolutely amazing cherry tomatoes that volunteered. They were the best cherry tomatoes that I have ever eaten. So I have saved the seeds, and will plant them next year. I will let you know how they turn out next summer.
Sunday, October 19, 2008
Apple Pie #1
Apple Pie #1
Unbaked pie crust for double crust pie.
8 or 9 tart cooking apples, pared
¾ cup sugar, more if desired
6 Tbsp. Flour
1 tsp. cinnamon
1 tsp. nutmeg
2 Tbsp. Butter
In a small bowl, combine flour, sugar, cinnamon and nutmeg. Sprinkle about ¼ cup of mixture on the bottom of the pie crust, and add the rest to the apples. Stir to coat apples. Fill pie crust heaping full of apple mixture, dot with butter. Place top crust over filling, flute edges. Cut slits on top crust and sprinkle with sugar. Bake about 50 minutes at 400°. Serve with vanilla ice cream.
Saturday, October 18, 2008
The Quilt Show
It is so inspirational to see so many completed quilts. It always makes me just want to come home and fire up the sewing machine. This was my favorite quilt of the show:
It was such a cheerful quilt. And besides, I do like red a great deal. After admiring it, I looked at the tag to read about who had made it; and it was actually made by a cousin of mine who gets together every year with all of the girls in her family to do some quilting. This particular quilt was actually a collaboration of all of them. They then had a drawing to see which one of them would get to keep it. Doesn't that sound like fun!!
I hope to make it back to the show on Sunday to hit the merchant mall. We actually ran out of time yesterday to do much shopping. I love bringing home fabric and new patterns to eventually make some day. And even if I don't ever make them, I do have fun looking at them and thinking of their many possibilities.