Showing posts with label Pie. Show all posts

Tuesday, October 18, 2011

An Apple Harvest

A couple of years ago, I posted about our apple tree which my son grew from the seeds of an apple that he had eaten.  Each fall I keep an eye on the tree hoping for a good harvest.  To my delight, this year I have had just that.  The other afternoon I went out to the tree and started picking, and filled up an entire large basket, as well as part of a plastic bag.  Now to many of you apple harvesters out there, this might not seem like many, but to me it was a lot.  To actually be able to go out to my own tree, pull up a ladder, and pick more than a dozen or so apples was such a treat. 

After picking the apples, I immediately went inside and started making a pie with them.  And of course the pie was to be for my son, now grown up, that planted those little seeds so many years ago.  He came over for dinner and I was so happy to be able to serve him a pie out of his very own apples.  We all took a bite, and to my disappointment the pie really wasn't very good.  The apples were still quite firm, and there just wasn't  much of the good juiciness that usually comes along with an apple pie.  The problem was that I have no idea what kind of apples they are; because really, who would keep track of the type of apple when your 7 year old son wants to eat an apple and plant the seeds to grow his very own tree.  And who really expects that the tree will someday actually grow and bear fruit.  But I'm not giving up, I have enough apples to experiment with them, and plan on trying another pie by cooking the apples first (which I have a recipe that calls for just that), and there is always applesauce. 


Tuesday, June 23, 2009

Chocolate Peanut Butter Pie

I openly admit to being somewhat addicted to chocolate/peanut butter combinations, and this pie is certainly no exception. I received this recipe years ago from my mom, and it has been one of my favorites ever since. In fact I like this pie so much, I literally think that if I was left alone in a room with it, and no one was looking, I could eat the entire thing in one sitting. Fortunately, that situation has never arisen.

I usually use a regular baked pie crust to put the filling into, but yesterday I decided to try a graham cracker crust. They are equally delicious.


Chocolate Peanut Butter Pie

Place 2 1/2 cups milk in a bowl (whole milk gives the best results, but is not necessary). Add anywhere from 2 T. to 1/2 cup peanut butter (depends on how much you like peanut butter) (creamy or crunchy) and 1 tsp. vanilla. Mix well. Add one 6-oz. box of instant chocolate pudding and beat for 2 minutes. Pour into baked and cooled pie shell. Let sit in refrigerator before serving. Enjoy!


Friday, May 8, 2009

Apple Pie #4

For those of you new to my blog, periodically I have posted various apple pie recipes (well 3 to be exact). This post brings me to the 4th. I am sort of on a quest to find the absolutely perfect apple pie recipe - if there really is such a thing. For the most part, it has just been fun to try out various twists on one of America's favorite pies.

I especially liked the maple syrup in this recipe. I don't often cook with maple syrup because in northern Idaho it is expensive; however, this was the perfect recipe to indulge in such a sweet treat.

Vermont Apple Pie
Your favorite pastry recipe for a two crust pie
9 cups peeled, sliced, tart apples
1 tablespoon fresh lemon juice
3/4 cup pure maple syrup
1/4 cup firmly packed brown sugar
1/4 cup all-purpose flour
1/2 teaspoon cinnamon

Preheat oven to 450 deg. Combine apples and lemon juice in a large bowl. Stir in the syrup. Add the brown sugar, flour, and cinnamon, tossing to coat. Place pastry into a 10 inch pie plate, leaving a 1-inch overhang. Spoon apple mixture into pastry shell. Place remaining pastry on top of filling. Trim and flute edge of pastry. Cut vents in the top crust.

Bake the pie for 10 minutes. Reduce oven temperature to 375 deg. Bake for 50 to 60 minutes more or until apples are tender and filling is bubbly. (If pastry browns too quickly, cover top loosely with foil.) Cool pie completely on wire rack or serve warm.


(Yes, those are candles in the pie -- it was a birthday pie)

Sunday, March 8, 2009

Pie Birds

A few years ago, I happened upon a couple of cute pie birds. I thought how fun it would be to pull a hot pie out of the oven and have a cute pie bird sitting in the middle of it. To be quite honest though, I have never used mine. It is not that I haven't wanted to though. Typically, I will finish off my pie with the top crust, and then think of it. It is my understanding that you want to set a pie bird in the middle of your bottom crust before you add the filling. The top crust is then placed over the top of the bird with a hole in the crust where the bird fits through. I have even read that when your pie is done, the bird will sing as a result of the steam going through it. I think that might only work with certain birds, although I am not certain. In the meantime, I use mine for decoration. My red cardinal is out in the winter months, while my sweet little bluebird is out in the spring and summer months. They look very sweet sitting next to a vase of flowers. At the present time though I have both of them out because even though it is March 8th, and spring is supposedly almost upon us, our snow has never left; and in fact it has been snowing both last night and this morning. So while we are waiting for warmer spring weather, both of my little birds will be gracing my kitchen with their presence.

Monday, November 10, 2008

Apple Pie #3

Over the weekend I tried out another new apple pie recipe. This one intrigued me because of the orange juice used in it. My family thought it was great. The orange juice and nutmeg gave it a very good flavor. It was very juicy though, and I thought that next time I would add some more flour for thickening. And then it dawned on me that the recipe calls for a lattice crust; however, I just used a regular crust on top. In hindsight, I think next time I will use a lattice top crust because that would perhaps allow for the orange juice mixture to evaporate more and thicken up on its own.

This recipe comes from the "Ladies' Home Journal 100 Great Pie & Pastry Recipes" cookbook. I really enjoy looking through this cookbook. There is a recipe in it for a chocolate peanut butter ice cream pie that has 720 calories per slice! Wow - that's a lot!! But it looks so delicious that I plan on making it some day.

Apple Pie #3

Pastry for a two crust pie
1 cup granulated sugar
3/4 cup orange juice
1/4 cup butter or margarine
1 tablespoon all-purpose flour
1/2 teaspoon nutmeg
8 cups Winesap or Rome Beauty apples, peeled, cored, and thinly sliced

Preheat oven to 400 deg. F.

For the filling, combine the sugar, orange juice, butter, flour, and nutmeg in a small saucepan. Cook, stirring over low heat until the sugar is dissolved and butter is melted.

Roll out the bottom crust for your pie and place it in your pie plate. Spoon the sliced apples into the pastry. Pour the sugar-orange mixture over the apples.

Prepare a lattice crust with your remaining pastry, and arrange on the top of your pie.

Bake for 15 minutes. Reduce oven temperature to 350 deg. F. Bake for 50 to 60 minutes more or until the apples are tender. Cool pie completely on a wire rack or serve warm.

Enjoy!!

Saturday, November 8, 2008

Freezing Fruit Pies

Today I have designated as a "day in the kitchen" for me. I have a surplus of apples that need to be tended to, as well as pears, and the last of the zucchini from my garden. I will be making a lot of applesauce to can, and pies to put in the freezer. Freezing the fruit pies is wonderful because then we can have apple pies for several months to come. How fun is it to plan a spur-of-the-moment apple pie for dessert without having to dirty up your kitchen with all of the preparations usually necessary.

I prepare the pies in the usual manner with a bottom and top crust. If your pies are typically juicy, then you can also add an additional tablespoon of thickener when you put it together. If you are going to freeze the pie, then it is best not to cut a vent in the top of it at this time. However, any observant readers will note that I actually did cut a vent in the picture of my "Apple Pie Number 2" that I posted before I froze it. I just did it out of habit, but don't think it will really make that much of a difference when it comes right down to it. Anyway, you should wrap the pie well, label it, and pop it in the freezer. I actually just pop it directly into a large freezer bag and make sure I get all of the air out of it. 2 gallon plastic storage bags are available at the grocery store in which a pie plate will fit nicely. I also label the baggie with the baking temperature and time since I could never keep track of which recipe was used in which pie. This way I don't have to hunt down the recipe at baking time, it's all right there on the bag.

When the opportunity arises to bake your pie, preheat the oven, unwrap the pie, place it on a cookie sheet, and cut vents in the top crust. Bake the unthawed pie just adding about 15 to 20 minutes to the recommended baking time. I personally have a problem with the edges of my pies getting too brown, so I purchased a couple of round pie shields that I just set right over the edges of my pie while it bakes. You can also use foil around the edges of your pie as well.

If you don't have extra pie plates to fill and freeze, you can also prepare the filling for a pie and put the filling in the freezer. When you are ready to use it, take it out of the freezer while you make the crust, put the filling directly in the crust, and continue as your recipe directs you.

I did mention that this is to be a day in the kitchen for me. I think I had better get busy on making pies myself.

Wednesday, October 29, 2008

Apple Pie #2

Here is the recipe for the next Apple Pie, or in this case it shall be referred to as Apple Pie #2. This pie recipe comes from yet another of my favorite cookbooks, "The Fannie Farmer Baking Book" by Marion Cunningham. In the cookbook, it is entitled "Basic Master Recipe: American Apple Pie". It is written for someone who has never made a pie before, and takes up a little more than 9 pages in a cookbook. That is a lot of pages! It gives extremely detailed directions along with illustrations of everything involved. So if you have never made a pie before, and are in need of being walked through the process step by step, then this cookbook is for you. I am going to limit my recipe to the most important part -- the apple filling; and assume that you either already know how to make a pie crust, or know where to find ready made crusts in your local grocery store. And as a side note, I used to buy the ready made crusts. When my children were younger, that seemed to be the easiest way to get a pie baked in a hurry. And then one day, I was referring to how my mom makes the best pie crusts in the world. One of my daughters looked at me with a surprised look on her face and said, "you mean you can make pie crusts?" At that moment I decided I needed to stop buying the ready made pie crusts, and start making them from scratch. It doesn't take that much time, and they really are far more superior to the store bought. Besides the fact that I felt horrified that my kids didn't even know that someone could "make" them.

My kitchen is very tiny, so when I do make pie crusts, I take over the kitchen table since I don't have the cupboard space. Here is proof that I did indeed make a homemade crust for "Apple Pie #2":


And now on to the recipe.
Apple Pie #2
Unbaked pie crusts for a double crust pie
8 cups sliced and peeled apples
3/4 cup sugar
1/2 tsp. cinnamon
1/4 tsp. nutmeg
2 T. flour
1/8 tsp. salt
1 T freshly squeezed lemon juice
2 T. (1/4 stick) butter
Preheat the oven to 425 degrees.
Stir together the sugar, cinnamon, nutmeg, flour, and salt. Combine with the apple slices. Sprinkle the lemon juice over this mixture and mix together. Pour the apple mixture into your unbaked pie crust. Slice the butter into small pieces onto the top of the apples. Place the top crust over all, press the edges of the crusts together and flute. Don't forget to cut a few slits into the top crust before baking. If you like, you can cover the edges of the pie crust with foil to keep them from browning too much.
Place the pie in the oven and bake for 30 minutes. Reduce the heat to 350 deg. and continue baking for 20 to 30 minutes, or until done.
This is what mine looked like before I popped it into the freezer. We will be tasting Apple Pie #2 at a later time.


Sunday, October 26, 2008

Pumpkin Pie

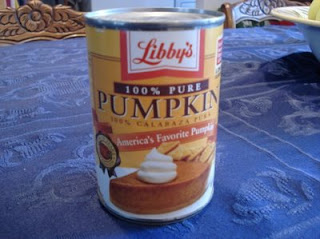
Sometimes at this time of year my kids will ask me to make a pumpkin pie. Typically though I will tell them that it is getting so close to Thanksgiving that I want to wait until then so we can really look forward to that first bite of pie after our Thanksgiving dinner. At that point my daughters will usually remind me about my dad. He really enjoyed pumpkin pie. Whenever he was wanting one, he wouldn't ask my mom. All he would do was leave a can of pumpkin out on the cupboard for her to discover. When she would see it, she immediately knew that he would like a pumpkin pie. Of course she would make him a pumpkin pie right away. So the other morning when I went into the kitchen, this is what I saw sitting on my kitchen cupboard:


with a note attached written in all capital letters saying PLEASE. So how could I resist such a request. Later that day when my kids got home from school, they were very surprised to see that I had actually baked them this:


I don't think it lessened our anticipation for our Thanksgiving pumpkin pie by any means. It only has made us look forward to it all that much more.

Sunday, October 19, 2008

Apple Pie #1

Apple season is upon us. My neighbors have been very generous with their apples this year, and have given us an abundance. They are delicious, and it is so wonderful to be able to grab a fresh apple for a snack. I wish that my boxes would stay full and crisp all year long; but unfortunately they need to be used up before they go bad. Actually it isn't unfortunate at all, because that means it is time to make up all sorts of fun apple treats. Today we had our first apple pie of the season. It really hit the spot. Every year I search for the absolutely perfect apple pie recipe. I haven't found it yet, but we sure have fun trying out different recipes. So I am going to post some of the different recipes that we try so that just in case there really is someone out there reading this blog, they can try them as well. So tonight's recipe comes from the cookbook entitled, "Just a Matter of Thyme" by Roxie Kelley and Shelly Reeves-Smith. This is actually one of my favorite cookbooks that I have. I turn to it quite often to make different things out of it. My brother and sister-in-law gave it to me for a birthday gift one year, and I still have the birthday card in it to use as a bookmark. I think birthday cards make great bookmarks ... but that is a topic for another time.

Apple Pie #1
Unbaked pie crust for double crust pie.
8 or 9 tart cooking apples, pared
¾ cup sugar, more if desired
6 Tbsp. Flour
1 tsp. cinnamon
1 tsp. nutmeg
2 Tbsp. Butter

In a small bowl, combine flour, sugar, cinnamon and nutmeg. Sprinkle about ¼ cup of mixture on the bottom of the pie crust, and add the rest to the apples. Stir to coat apples. Fill pie crust heaping full of apple mixture, dot with butter. Place top crust over filling, flute edges. Cut slits on top crust and sprinkle with sugar. Bake about 50 minutes at 400°. Serve with vanilla ice cream.