Showing posts with label Recipes. Show all posts
Showing posts with label Recipes. Show all posts
Monday, May 19, 2014
Buffalo Chicken Sliders
Presently, it seems as if sliders are showing up in all kinds of variations. I like sliders. They seem to take the ordinary sandwich and turn it into fun food in my mind. Recently my daughters made Buffalo Chicken Sliders for dinner. This sandwich has a great flavor and a nice crunch with the fresh ingredients used as a topping. And let me just emphasize here that they are made in the crock pot. An added bonus in my mind. They found the recipe on Pinterest, and here is the link to the original blog, The Country Cook, that came up with the recipe in the first place.


Wednesday, May 15, 2013
Lemon Bars
Chocolate is my all time favorite dessert, whatever form it may come in; but now and then I do stray from that tasty morsel and venture into other dessert arenas. Recently, I was planning a visit to my mom and wanted to bring some dessert along to give to her. I know how she loves lemony desserts, and my eye landed on a lemon bar recipe in the current issue of Food Network magazine. It is a Paula Deen recipe, and knowing her reputation for rich and delicious desserts, decided to give it a try. Well, I must say, these were the most fabulous lemon bars that I have ever tasted in my entire life. I think from now on I will just dismiss any future recipes I might happen upon, because I don't think these could ever be topped.

Wednesday, October 3, 2012
To Sift or Not to Sift
Most modern recipes don't call for the sifting of flour when baking. I think that because of more modern ways of milling the flour, it really isn't necessary. However, I always prefer sifting. I don't know if it even makes a bit of difference, but how can you go wrong by sifting all of those powdery ingredients together to form a nice little soft mountain.

Now, after reading such a strong argument in favor of sifting, why not reach up on your shelf and find your cutest muffin liners,


Banana Nut Muffins
2 cups flour
1 Tbsp. baking powder
1/2 tsp salt
1/2 cup butter
1 cup sugar
2 eggs
1 1/3 cups mashed, ripe bananas
1 cup chopped pecans or walnuts
Sift together flour, baking powder, and salt. Set aside. Cream together shortening and sugar. Beat in eggs, one at a time. Stir in mashed bananas. Add dry ingredients all at once, stirring just enough to moisten. Gently stir in nuts. Spoon into greased (or lined) muffin tins, filling 2/3 full. Bake in 350 deg. oven for 18-20 minutes or until golden. Makes 15-18 muffins.

Now, after reading such a strong argument in favor of sifting, why not reach up on your shelf and find your cutest muffin liners,

and gather the ingredients together to make these easy and delicious banana nut muffins. I'll leave the sifting choice up to you.

Banana Nut Muffins
2 cups flour
1 Tbsp. baking powder
1/2 tsp salt
1/2 cup butter
1 cup sugar
2 eggs
1 1/3 cups mashed, ripe bananas
1 cup chopped pecans or walnuts
Sift together flour, baking powder, and salt. Set aside. Cream together shortening and sugar. Beat in eggs, one at a time. Stir in mashed bananas. Add dry ingredients all at once, stirring just enough to moisten. Gently stir in nuts. Spoon into greased (or lined) muffin tins, filling 2/3 full. Bake in 350 deg. oven for 18-20 minutes or until golden. Makes 15-18 muffins.
Tuesday, July 31, 2012
Lesson Learned
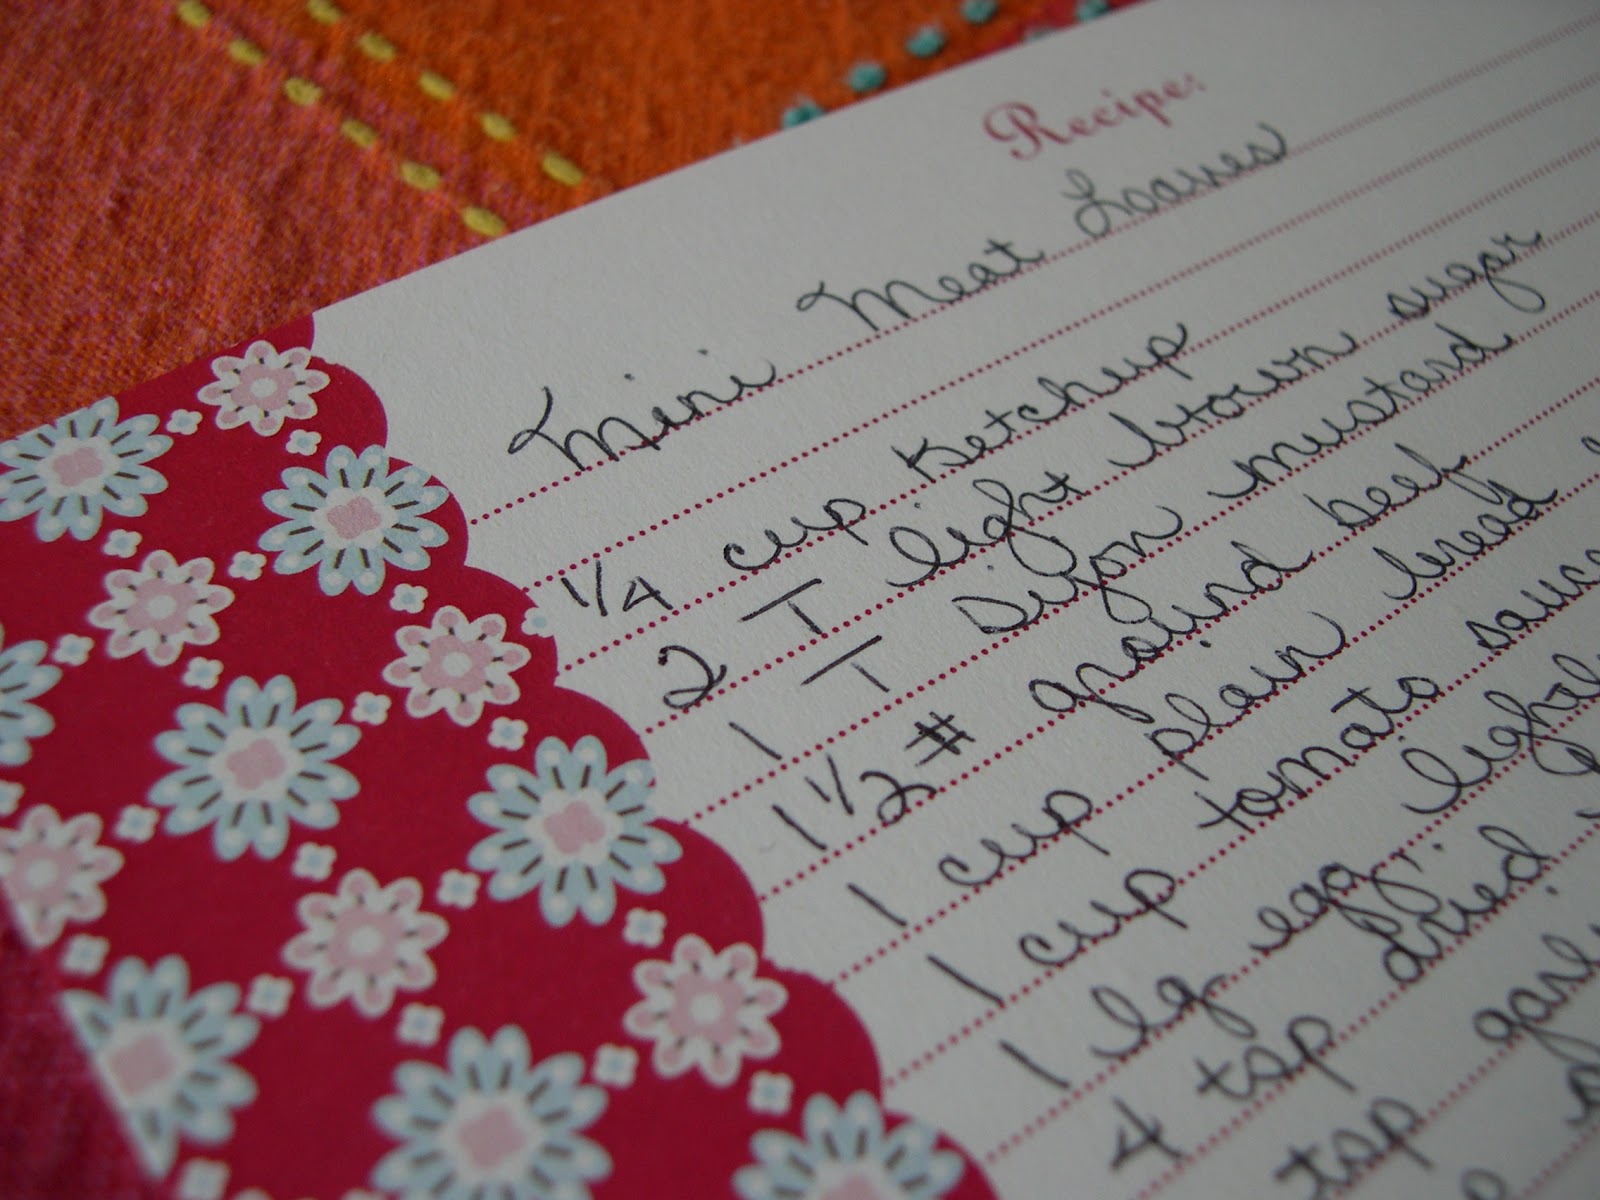
I have favorite recipes in particular cookbooks that I just always know are there whenever I need them. And that works just fine unless it is the only recipe in the cookbook that I use. Which was the case for my recipe for Mini Meat Loaves. This particular cookbook belonged to my daughters, and it was always on their bookshelf whenever I needed it. Until one day I went for it and it wasn't there. When I asked them where it was, they said they had assumed I had copied down my recipe, and since we didn't use the book for any other recipes, they thought they had donated it to a thrift shop. Well, I hadn't copied it down, and really wished that I had as it was one of those go to recipes that I like to use. But fortunately the little book was found in a stack of books on their way to the thrift shop, and I was so happy. I immediately copied the recipe down and realized that I need to do this with other recipes that I like from books I don't use for anything else. So my lesson was learned, and in case you are interested, the recipe follows. If you like meat loaf, these have a very good flavor, and because they are small, they cook very quickly.

Mini Meat Loaves
1/4 cup ketchup
2 T light brown sugar
1 T Dijon mustard
1 1/2 pounds ground beef
1 cup bread crumbs
1 cup tomato sauce
1 large egg, lightly beaten
4 tsp dried basil
1 tsp garlic powder
1 tsp onion powder
salt and pepper
Line a broiler pan with foil and place in oven. Preheat oven to 425 deg. Whisk together ketchup, brown sugar, and mustard in a small bowl and set aside. In a large bowl, combine remaining ingredients, but do not overmix. Divide mixture into 4 equal portions (I actually divide it into even more portions) and shape each into a mini loaf.
Bruch each loaf with ketchup mixture. Remove pan from oven and mist with Pam. Transfer meat loaves to hot broiler pan, and bake about 20-25 minutes or until center registers 160 deg. F. Let stand on broiler pan for 2 to 3 minutes before transferring to plates.

Mini Meat Loaves
1/4 cup ketchup
2 T light brown sugar
1 T Dijon mustard
1 1/2 pounds ground beef
1 cup bread crumbs
1 cup tomato sauce
1 large egg, lightly beaten
4 tsp dried basil
1 tsp garlic powder
1 tsp onion powder
salt and pepper
Line a broiler pan with foil and place in oven. Preheat oven to 425 deg. Whisk together ketchup, brown sugar, and mustard in a small bowl and set aside. In a large bowl, combine remaining ingredients, but do not overmix. Divide mixture into 4 equal portions (I actually divide it into even more portions) and shape each into a mini loaf.
Bruch each loaf with ketchup mixture. Remove pan from oven and mist with Pam. Transfer meat loaves to hot broiler pan, and bake about 20-25 minutes or until center registers 160 deg. F. Let stand on broiler pan for 2 to 3 minutes before transferring to plates.

Wednesday, March 14, 2012
Homemade Granola
This morning for breakfast I am going to have granola. Not the expensive store bought kind, but fresh homemade granola. My daughter gave me the recipe to try, and oh my, I must say that at least for me it is a bit addictive. I honestly think I could sit down and eat the whole batch if left on my own.
The recipe comes from the April 2012 issue of Cooks Illustrated. In the article the whole process of making the granola is discussed in great detail as to all of the steps that were gone through to come up with the perfect ingredients. They recommend not using quick oats, the results will not be very good. I happened to have some nuts in my freezer that needed using up, so I just used a combination of almonds, pecans, and walnuts. This mixes up so fast and easily that I'm not sure I will ever buy granola again.
1/3 cup packed light brown sugar
4 tsp. vanilla extract
½ tsp. salt
½ cup vegetable oil
5 cups old fashioned rolled oats
2 cups raw almonds, chopped coarse
2 cups raisins or other dried fruit, chopped
Adjust oven rack to upper-middle position and heat oven to 325 degrees. Line rimmed baking sheet with parchment paper.
Whisk maple syrup, brown sugar, vanilla, and salt in large bowl. Whisk in oil. Fold in oats and almonds until thoroughly coated.

The recipe comes from the April 2012 issue of Cooks Illustrated. In the article the whole process of making the granola is discussed in great detail as to all of the steps that were gone through to come up with the perfect ingredients. They recommend not using quick oats, the results will not be very good. I happened to have some nuts in my freezer that needed using up, so I just used a combination of almonds, pecans, and walnuts. This mixes up so fast and easily that I'm not sure I will ever buy granola again.
Almond Granola with Dried
Fruit
1/3 cup maple syrup1/3 cup packed light brown sugar
4 tsp. vanilla extract
½ tsp. salt
½ cup vegetable oil
5 cups old fashioned rolled oats
2 cups raw almonds, chopped coarse
2 cups raisins or other dried fruit, chopped
Adjust oven rack to upper-middle position and heat oven to 325 degrees. Line rimmed baking sheet with parchment paper.
Whisk maple syrup, brown sugar, vanilla, and salt in large bowl. Whisk in oil. Fold in oats and almonds until thoroughly coated.
Transfer oat mixture to prepared
baking sheet and spread across sheet into thin, even layer (about 3/8 inch
thick). Using stiff metal spatula (I
actually used a potato masher), compress oat mixture until very compact. Bake until lightly browned, 40 to 45 minutes,
rotating pan once halfway through baking.
Remove granola from oven and cool on wire rack to room temperature,
about 1 hour. Break cooled granola into
pieces of desired size. Stir in dried
fruit.
Granola can be stored in airtight
container for up to 2 weeks
Friday, February 3, 2012
Making Hamburger Buns at Home
I've mentioned numerous times how much of a fan I am of King Arthur Flour. I enjoy looking around their online store since they happen to be clear across the country from me, and I also frequent their blog. I believe it was last spring when they posted a recipe for hamburger buns that caught my eye. I tried them, and it was a big hit at our house. And now I can hardly bring myself to buy hamburger buns in the store any longer. If you have a bread machine, it makes these buns so simple to make. You just need to start them early enough in the day so that they will be ready for dinner. Here is the link to the recipe, and I promise you will love them.


Friday, January 27, 2012
Peppermint Ice Cream
You may be very organized and throw all of your leftover candy canes away when Christmas has come and gone. Or perhaps you are like me and think that there must be something that you can do with all of that delicious peppermint confection. Sometimes I just toss all of them into the food processor, chop them up very tiny, store it in a jar, and sprinkle it on vanilla ice cream. The only problem with that is it seems like I have the jar sitting on my pantry shelf forever, not using it up as I had originally intended. Well, this year my sister, Kass, gave me a recipe for Peppermint ice cream that is so good. According to the recipe you don't even need a little ice cream maker; however, I do happen to have one, so I cut the recipe in half, and just threw all of the ingredients into my ice cream maker, and it turned out delicious. It uses a lot of candy canes as well, so you can make short order of however many you may have sitting around after the holidays.
Peppermint Ice Cream
28 candy canes
2 cups half and half
4 cups heavy whipping cream
1. Unwrap candy canes and place in a freezer bag. Seal bag and use a rolling pin to beat candy canes into tiny pieces. (I actually just ground mine up in my food processor). Pour candy cane bits into the bottom of an eight-quart freezer-safe container.
2. Pour whipping cream and half and half on top of candy cane bits. Stir until well mixed. Cover and refrigerate for 12 hours, stirring occasionally.
3. Remove from fridge and stir until blended. Pour mixture into the bowl of an electric mixer. Whip until soft peaks begin to form.
4. Place cream back into a freezer-safe container and freeze until set up -- about 8-12 hours.

Peppermint Ice Cream
28 candy canes
2 cups half and half
4 cups heavy whipping cream
1. Unwrap candy canes and place in a freezer bag. Seal bag and use a rolling pin to beat candy canes into tiny pieces. (I actually just ground mine up in my food processor). Pour candy cane bits into the bottom of an eight-quart freezer-safe container.
2. Pour whipping cream and half and half on top of candy cane bits. Stir until well mixed. Cover and refrigerate for 12 hours, stirring occasionally.
3. Remove from fridge and stir until blended. Pour mixture into the bowl of an electric mixer. Whip until soft peaks begin to form.
4. Place cream back into a freezer-safe container and freeze until set up -- about 8-12 hours.

Thursday, January 19, 2012
Caramel Corn at Home
It just seems to kind of make for a fun time to have a table set out with all kinds of finger foods and various munchies to partake of whenever the moment strikes you. This past Sunday, I decided that I should do just that while we watched the football games. I was able to come up with quite a few ideas even though I thought of it kind of last minute. One of the things I made was caramel corn. I haven't made this for years, and fortunately was able to place my hand on the recipe. The ingredients are basic, but the one odd thing you might not have on hand is a large paper grocery sack. When I get groceries, I just ask the clerk for a few extra. I figure that way the bag will be clean to cook the popcorn in. And the recipe calls for either peanuts or almonds; however, you can use whatever type of nut you like. This last time I made it, I just used some mixed nuts that I happened to have on hand. The only problem though is once you start eating it, it is seriously hard to stop.
Microwave Nutty-Caramel Corn
1 cup packed golden brown sugar
1/4 cup light corn syrup
1/2 tsp. salt
4 tablespoons unsalted butter
1 tsp. vanilla extract
1/2 tsp. baking soda
8 cups popped unflavored popcorn
2 cups roasted unsalted peanuts, or almonds
In a large glass measuring cup, combine the sugar, syrup, salt, butter, and vanilla. Microwave on high for 1 minute. Stir and cook for an additional 2 minutes. Add the baking soda and stir well (mixture will foam).
Combine the popcorn and peanuts in a large brown paper bag. Pour the syrup into the bag and stir to coat. Turn the bag under to close, and microwave on high for 1 minute.
Transfer the caramel corn mixture to a baking sheet lined with waxed paper to cool. (It gets crunchier the longer it cools). Keep in an airtight container until ready to serve.

Microwave Nutty-Caramel Corn
1 cup packed golden brown sugar
1/4 cup light corn syrup
1/2 tsp. salt
4 tablespoons unsalted butter
1 tsp. vanilla extract
1/2 tsp. baking soda
8 cups popped unflavored popcorn
2 cups roasted unsalted peanuts, or almonds
In a large glass measuring cup, combine the sugar, syrup, salt, butter, and vanilla. Microwave on high for 1 minute. Stir and cook for an additional 2 minutes. Add the baking soda and stir well (mixture will foam).
Combine the popcorn and peanuts in a large brown paper bag. Pour the syrup into the bag and stir to coat. Turn the bag under to close, and microwave on high for 1 minute.
Transfer the caramel corn mixture to a baking sheet lined with waxed paper to cool. (It gets crunchier the longer it cools). Keep in an airtight container until ready to serve.

Sunday, November 20, 2011
A Vanilla Experiment
Real vanilla is a must in my kitchen. I haven't bothered with the imitation variety for years, and some of the best vanilla I have used has been gifts from Mexico. Their vanilla seems so much purer than the types found locally. I typically purchase mine at Costco since their price just can't be beat. But recently, I have been reading articles on making your own vanilla. I'm always up for a fun experiment so when I saw Costco recently selling vanilla beans, I decided to give it a go. After reading many, many articles on this particular topic, I finally settled on this basic method.
Of course first, you need vanilla beans. As mentioned above, I purchased mine at Costco:

With the Costco package you get two vials with 5 vanilla beans in each. And just as a totally unrelated side note, the vials are really cool, and I'm determined to find a useful purpose for them.
I just used pint canning jars for my concoction of vanilla. My choice was pint jars simply because I have a lot of them on hand. In each of the three jars I poured one cup of vodka. And then I placed three vanilla beans in each jar making sure that the beans were pushed down below the top level of the vodka.

The jars then found a home on one of my pantry shelves that remains in the dark, unless of course I need something off of that particular shelf.
To help the process along, the jars need to be shaken a couple of times a week. And look here, after just one week, it is starting to look like vanilla:

I read varying reports about how long this whole process takes. The times varied from 2 to 6 months. I will probably lean more toward the 6 months, as it only makes sense that the longer it sits, the better flavor it will have.
The only regret I have is that I didn't start this 6 months ago. Wouldn't it be fun to give homemade vanilla in cute little bottles as gifts for Christmas? Maybe next year if this works out.
I have one lonesome vanilla bean left over from my original package so I have great plans to make vanilla sugar with that. I will have to let you know how that works out.
Of course first, you need vanilla beans. As mentioned above, I purchased mine at Costco:

With the Costco package you get two vials with 5 vanilla beans in each. And just as a totally unrelated side note, the vials are really cool, and I'm determined to find a useful purpose for them.
I just used pint canning jars for my concoction of vanilla. My choice was pint jars simply because I have a lot of them on hand. In each of the three jars I poured one cup of vodka. And then I placed three vanilla beans in each jar making sure that the beans were pushed down below the top level of the vodka.

The jars then found a home on one of my pantry shelves that remains in the dark, unless of course I need something off of that particular shelf.
To help the process along, the jars need to be shaken a couple of times a week. And look here, after just one week, it is starting to look like vanilla:

I read varying reports about how long this whole process takes. The times varied from 2 to 6 months. I will probably lean more toward the 6 months, as it only makes sense that the longer it sits, the better flavor it will have.
The only regret I have is that I didn't start this 6 months ago. Wouldn't it be fun to give homemade vanilla in cute little bottles as gifts for Christmas? Maybe next year if this works out.
I have one lonesome vanilla bean left over from my original package so I have great plans to make vanilla sugar with that. I will have to let you know how that works out.
Tuesday, May 24, 2011
A Special Breakfast
Back in the years between the1940's and 1960's, I think every housewife must have had her own set of special glass luncheon plates. They are little rectangular glass plates with a little designated circle on them to hold a matching glass cup. Nowadays you see them practically lining the shelves in every thrift shop across the country. I have always been fascinated with them because my mom had a set, and they were only pulled out for special occasions, or when her ladies' card club took a turn meeting at our house. I can remember watching her unpack them and thinking they were about the prettiest thing around. So one time I found a small set, including most of the cups, for next to nothing. I brought them home, washed them up, and it truly made my heart happy to have my very own set. I pulled them out to use for a special breakfast recently. The breakfast was special just because I was with my daughters and it was Sunday. One of my daughters put together a lovely combination of fruit, and I made the Food Network's Maple Pecan Scones. The fruit was so sweet and delightful, and the scones are simply wonderful.


Monday, April 11, 2011
Brownie Cups
It is so nice to have daughters that just taken it upon themselves to bake at a moment's notice. Yesterday my youngest did just that. She wandered out into the kitchen with a cookbook in hand. A short while later, this is what was cooling on my kitchen table:

Ahhhh, what a treat they have been. The recipe actually calls for peanut butter chips; however, not only did we not have any on hand, but peanut butter things really aren't my husband's favorite so we substituted chocolate chips.
Brownie Cups
1 cup (2 sticks) butter or margarine
2 cups sugar
2 tsp. vanilla extract
4 eggs
3/4 cup Hershey's cocoa
1 3/4 cups all-purpose flour
1/2 tsp. baking powder
1/2 tsp. salt
1 2/3 cups (10-oz. pkg) peanut butter chips (or any chips of your choice), divided
Heat oven to 350 deg. F. Line 18 standard size muffin cups with paper or foil bake cups.
Place butter in large microwave-safe bowl and microwave at high 1 to 1 1/2 minutes or until melted. Stir in sugar and vanilla. Add eggs; beat well. Add cocoa and beat until well blended. Add flour, baking powder and salt and beat well. Stir in 1 1/3 cups flavored chips. Divide batter evenly into muffin cups and sprinkle with remaining 1/3 cup of chips.
Bake 25 to 30 minutes or until surface is firm. Cool completely in pan on wire rack.
~Enjoy~

Ahhhh, what a treat they have been. The recipe actually calls for peanut butter chips; however, not only did we not have any on hand, but peanut butter things really aren't my husband's favorite so we substituted chocolate chips.
Brownie Cups
1 cup (2 sticks) butter or margarine
2 cups sugar
2 tsp. vanilla extract
4 eggs
3/4 cup Hershey's cocoa
1 3/4 cups all-purpose flour
1/2 tsp. baking powder
1/2 tsp. salt
1 2/3 cups (10-oz. pkg) peanut butter chips (or any chips of your choice), divided
Heat oven to 350 deg. F. Line 18 standard size muffin cups with paper or foil bake cups.
Place butter in large microwave-safe bowl and microwave at high 1 to 1 1/2 minutes or until melted. Stir in sugar and vanilla. Add eggs; beat well. Add cocoa and beat until well blended. Add flour, baking powder and salt and beat well. Stir in 1 1/3 cups flavored chips. Divide batter evenly into muffin cups and sprinkle with remaining 1/3 cup of chips.
Bake 25 to 30 minutes or until surface is firm. Cool completely in pan on wire rack.
~Enjoy~
Wednesday, March 9, 2011
Amazing Cupcakes
This morning I have been busy making two different batches of breakfast cookies. I have been trying to perfect the recipe by trying many different variations in order to find that perfect combination for us. So far our favorite fruit to add has been a combination of dried apricots, dried blueberry infused craisins, and craisins. I have kept track of everything I have tried on the paper that I printed the recipe on. It is getting quite marked up. But I think it is about time to copy the recipe onto a more permanent recipe card before I lose it.
Next up, I think I will perhaps try the dark chocolate cupcakes with salted vanilla caramel icing from the King Arthur Baking Banter blog. When I saw the recipe I immediately printed it out and have moved it to the front of many other recipes to try that I have printed out from this particular blog. In fact I have now added their blog over on my sidebar so that you can also easily access and enjoy all of the amazing things that they bake up every day.
Here is their picture of the cupcakes that they made. Now you just have to admit that they look amazing.

Next up, I think I will perhaps try the dark chocolate cupcakes with salted vanilla caramel icing from the King Arthur Baking Banter blog. When I saw the recipe I immediately printed it out and have moved it to the front of many other recipes to try that I have printed out from this particular blog. In fact I have now added their blog over on my sidebar so that you can also easily access and enjoy all of the amazing things that they bake up every day.
Here is their picture of the cupcakes that they made. Now you just have to admit that they look amazing.
Saturday, January 22, 2011
Breakfast Cookies
My daughters used to buy breakfast cookies at the grocery store, and then they seemed to disappear from the shelves. They liked having them on the mornings they needed to grab a quick breakfast before school, or now and then when they needed a filling snack. I had forgotten about them until last week when King Arthur Flour posted a recipe for them on their website. I gave them a try, and they are very good. It was a great opportunity to use up all of the leftover bits of dried fruit and nuts that we had used in our Christmas baking. And they are definitely filling. I also think they would make a great snack for active kids that need something healthy and filling in the afternoon. They also keep well just in case you don't manage to get through them all in a day or two.
 (Note ... my picture didn't come out very well, so I am hereby giving full credit of this picture to King Arthur Flour).
Thursday, November 11, 2010
Apple Butter
Apple season has been going on for a while around here; however, I seem to be running a bit late with making all of my apple goodies. Nonetheless, the time has begun, and I have started this year with apple butter. I particularly like this recipe because it is all done in the crockpot. The recipe calls for not peeling the apples first, which I have read gives you a much better flavor in your final product. All of the ingredients make for a perfect blend. And the aroma in your kitchen while it is cooking is delightful. In fact when my kids were younger, they would tell me that "it smelled like Christmas".
Cider Apple Butter
5 lbs. cooking apples
1 1/2 cups apple cider
about 3 cups of brown sugar
juice and grated peel of 1 each lemon and orange
2 tsp. cinnamon
1 tsp. allspice
1/4 tsp. each cloves and nutmeg
Core and quarter apples, but do not peel. Place in crockpot with apple cider. Cook on high until very soft, about 1-1/2 hours. (Note: It takes about 2-1/2 hrs. in my crockpot). Press cooked apples through a food mill or sieve. (I don't have a food mill, so I just very patiently remove all of the apple peel). Measure. There should be about 6 cups. For every 1 cup fruit pulp, allow 1/2 cup brown sugar. Return to crockpot. Stir in lemon and orange peel and juice, cinnamon, allspice, cloves, and nutmeg. Cover and cook on high until thick and dark, about 4 hours. Immediately pour into hot, sterilized glass jars and seal according to proper boiling/water bath canning requirements. Makes about 8 cups.

Cider Apple Butter
5 lbs. cooking apples
1 1/2 cups apple cider
about 3 cups of brown sugar
juice and grated peel of 1 each lemon and orange
2 tsp. cinnamon
1 tsp. allspice
1/4 tsp. each cloves and nutmeg
Core and quarter apples, but do not peel. Place in crockpot with apple cider. Cook on high until very soft, about 1-1/2 hours. (Note: It takes about 2-1/2 hrs. in my crockpot). Press cooked apples through a food mill or sieve. (I don't have a food mill, so I just very patiently remove all of the apple peel). Measure. There should be about 6 cups. For every 1 cup fruit pulp, allow 1/2 cup brown sugar. Return to crockpot. Stir in lemon and orange peel and juice, cinnamon, allspice, cloves, and nutmeg. Cover and cook on high until thick and dark, about 4 hours. Immediately pour into hot, sterilized glass jars and seal according to proper boiling/water bath canning requirements. Makes about 8 cups.

Wednesday, October 20, 2010
Zucchini Bread
Zucchini season is coming to a close. I still have a few left to work with; but for the most part, the zucchini days of 2010 are over. Throughout the summer I typically make a zucchini stir fry with most of the reasonably sized ones. I save the big ones however for zucchini bread. My mother-in-law gave me this unique recipe years ago. The unique features are that it is made with wheat germ, maple flavoring instead of the typical vanilla, and sesame seeds sprinkled across the top.
Recently I spent the better part of a Saturday making zucchini bread. Here are the loaves waiting very patiently to cool before I popped most of them into the freezer to pull out some cold, winter day to have with a cup of hot tea:

If you look closely, in the bottom right hand corner, you will see one particular loaf in a very cute loaf pan. Here is a closer view:

Isn't that cute! My sister, Miki, and her daughter (my niece), Annie, gave it me this summer for my birthday. It is my favorite loaf pan of all of my loaf pans. Just looking at it makes me want to go bake something.
Well, now I have gotten side tracked by the cute pan, I guess I should move on to the recipe:
Wheat Germ Zucchini Bread
2 1/2 cups all purpose flour
1/2 cup toasted wheat germ
2 tsp. baking soda
1 tsp. salt
1/2 tsp. baking powder
1 cup finally chopped walnuts
3 large eggs
1 cup canola oil
1 cup granulated sugar
1 cup firmly packed brown sugar
1 Tablespoon maple flavoring
2 cups coarsely shredded zucchini
1/3 cup sesame seeds
Combine flour, wheat germ, baking soda, salt, baking powder, and walnuts. Set aside. In a large bowl, beat eggs with an electric mixer until blended. Add oil, sugars, and maple flavoring. Continue to beat until mixture is thick and foamy. Add flour mixture and stir just until blended. Stir in zucchini. Divide batter equally between 2 greased and flour dusted 5 x 9 loaf pans. (Actually I've used all sizes, just be sure to adjust the baking time). Sprinkle sesame seeds evenly over batter. Bake in 350 deg. oven until a toothpick inserted in center comes out clean (about 45 min). Let cool 10 minutes in pans.
Enjoy :-)
Tuesday, October 5, 2010
Peach Crisp
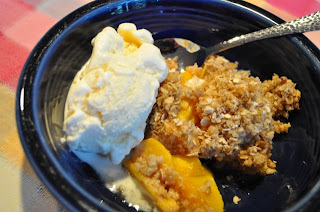
I have enjoyed our "peach season" this year. There is just something about having fresh peaches on hand that just seems so summery. One way I put them to use is by making a peach crisp. My go-to recipe is actually a combination of a couple of different recipes. And of course when eating it still warm from the oven, a scoop of ice cream is a must.
Peach Crisp
4 cups sliced fresh (or frozen) peaches
1/3 cup sugar
1/2 tsp. ground cinnamon
1-1/2 cups rolled oats
1/2 cup packed brown sugar
1/4 cup all-purpose flour
5 tablespoons butter or margarine
Toss peaches with 1/3 cup sugar and cinnamon. Spoon into a lightly greased 8 inch square baking dish, or a 9 inch deep dish pie plate, and set aside. Combine oats, brown sugar and flour. Cut in butter with a pastry blender until mixture is crumbly. Sprinkle on top of peaches. Bake at 350 deg. for 25-30 minutes or until golden and bubbly.
Peach Crisp
4 cups sliced fresh (or frozen) peaches
1/3 cup sugar
1/2 tsp. ground cinnamon
1-1/2 cups rolled oats
1/2 cup packed brown sugar
1/4 cup all-purpose flour
5 tablespoons butter or margarine
Toss peaches with 1/3 cup sugar and cinnamon. Spoon into a lightly greased 8 inch square baking dish, or a 9 inch deep dish pie plate, and set aside. Combine oats, brown sugar and flour. Cut in butter with a pastry blender until mixture is crumbly. Sprinkle on top of peaches. Bake at 350 deg. for 25-30 minutes or until golden and bubbly.

Monday, August 9, 2010
A Sandwich Fit for a Picnic
I make a sandwich that lends itself extremely well for an on-the-go activity. It can be made ahead of time and wrapped up tightly to prevent drying out; and since it can be put together very quickly, I took all of the ingredients with us on a recent camping trip. In no time at all, we were sitting around the picnic table feasting on this delicious sandwich.
Picnic Sandwich
1 loaf French bread
Mustard (or really anything that you prefer on a sandwich)
1/2 lb. hard salami, sliced
4 oz. sliced Swiss cheese
2 tomatoes, sliced
Salt and pepper
1/2 lb. thinly sliced ham
1/2 cucumber, thinly sliced
1 large onion, sliced
4 or 5 crisp lettuce leaves
Cut bread in half horizontally. Spread the bottom and top layer with mustard (or whatever you like the most). Layer the salami, cheese, and tomatoes on the bread, seasoning tomatoes with salt and pepper. Layer ham, cucumber, onion slices, and lettuce on top of the tomatoes. Place top on sandwich. Wrap tightly in plastic wrap for storage. When ready to eat, cut into 6 sections.

Picnic Sandwich
1 loaf French bread
Mustard (or really anything that you prefer on a sandwich)
1/2 lb. hard salami, sliced
4 oz. sliced Swiss cheese
2 tomatoes, sliced
Salt and pepper
1/2 lb. thinly sliced ham
1/2 cucumber, thinly sliced
1 large onion, sliced
4 or 5 crisp lettuce leaves
Cut bread in half horizontally. Spread the bottom and top layer with mustard (or whatever you like the most). Layer the salami, cheese, and tomatoes on the bread, seasoning tomatoes with salt and pepper. Layer ham, cucumber, onion slices, and lettuce on top of the tomatoes. Place top on sandwich. Wrap tightly in plastic wrap for storage. When ready to eat, cut into 6 sections.

Monday, July 12, 2010
Tinkered Berry Muffins
When I find time for visiting various blogs, I never miss hopping over to Bluebird Notes. Koralee has one of the cheeriest blogs around I think. While meandering through her list of "inspiring friends" along her sidebar, I happened upon Cottage, where I found the recipe for these delicious muffins. They went together so quick, and were so easy. At first I wasn't sure about a muffin recipe using Bisquick since sometimes they seem to have a tendency to be "heavy". These Tinkered Berry Muffins weren't heavy at all, and the combination of bananas, blueberries, and oats was very good. And just as a side note .... I read once that when you take muffins out of the oven, if you tip them on their side while they cool, it will prevent the bottoms of them from becoming soggy.


Thursday, June 17, 2010
Summer Lessons
With the end of the school year comes the beginning of a variety of lessons throughout the summer for the kids. It might be swimming lessons, tennis lessons, baseball, softball, or even art lessons. But whatever the type of lesson, they can sometimes fall right at a mealtime. A great way to avoid running through the drive thru at a fast food restaurant, is to plan some of these healthy snacks that my blog friend, Sheila, from Alice and the Mock Turtle came up with last summer during their busy swim season. I think they are great ideas not only to take with you during various activities; but also, just to pack up sometime for a spur of the moment summer picnic.

Photo of picnic basket taken from a random internet search -- with no link to find out where it is from. I wish I could find it as I think this is quite possibly my dream picnic basket :-)
Wednesday, April 21, 2010
Taco Salad
Sometimes when I need a quick idea for dinner, I choose taco salad. It's relatively fast, and customizable. By customizable, I mean that you don't have to put everything in it. Sitting around my table at each meal are a variety of likes and dislikes. We have the non-tomato eaters, non-avocado eaters, and even a non-cheese eater (that's me, and I know it is unthinkable to some of you). So when I make it, I have the basic salad, and serve all of the optional toppings in separate small serving dishes for everyone to choose or not choose according to their personal likes or dislikes.
My recipe is very basic ..... lettuce,1 can of kidney beans rinsed, green onions, sliced black olives, and 1 pound ground beef that has been seasoned with my taco seasoning mix (and cooled before adding to the lettuce). The separate items that I include on the side are grated cheese, diced tomatoes, avocadoes, and tortilla chips that have been crushed. Of course you could just add all of that to your salad along with the basic ingredients (except for the crushed chips -- they can get a bit soggy if there is enough salad remaining for leftovers). I serve the salad dressing on the side, which of course can be whatever your preference is; but a favorite of ours to have with this salad is Catalina. And then of course I never forget the salsa and the taco hot sauce.

My recipe is very basic ..... lettuce,1 can of kidney beans rinsed, green onions, sliced black olives, and 1 pound ground beef that has been seasoned with my taco seasoning mix (and cooled before adding to the lettuce). The separate items that I include on the side are grated cheese, diced tomatoes, avocadoes, and tortilla chips that have been crushed. Of course you could just add all of that to your salad along with the basic ingredients (except for the crushed chips -- they can get a bit soggy if there is enough salad remaining for leftovers). I serve the salad dressing on the side, which of course can be whatever your preference is; but a favorite of ours to have with this salad is Catalina. And then of course I never forget the salsa and the taco hot sauce.

Subscribe to:
Posts (Atom)